Preparation before brushing
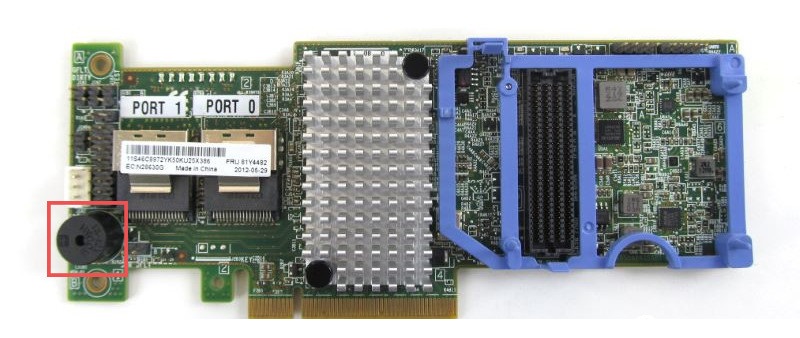
Remove the black round buzzer
After refreshing the firmware, the buzzer will keep sounding, so remove the buzzer in advance.
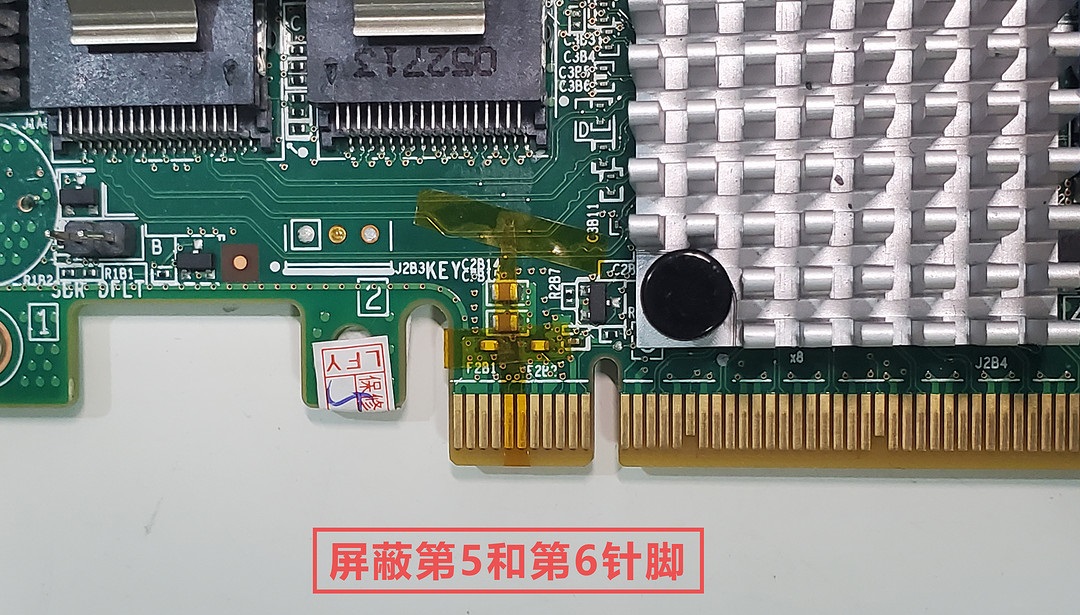
Shield array card gold finger pins 5 and 6
Use transparent glue or heat-insulating tape to shield the 5th and 6th pins of the array card gold finger. The server motherboard does not need to shield them, but it is recommended to shield them for compatibility with home motherboards.
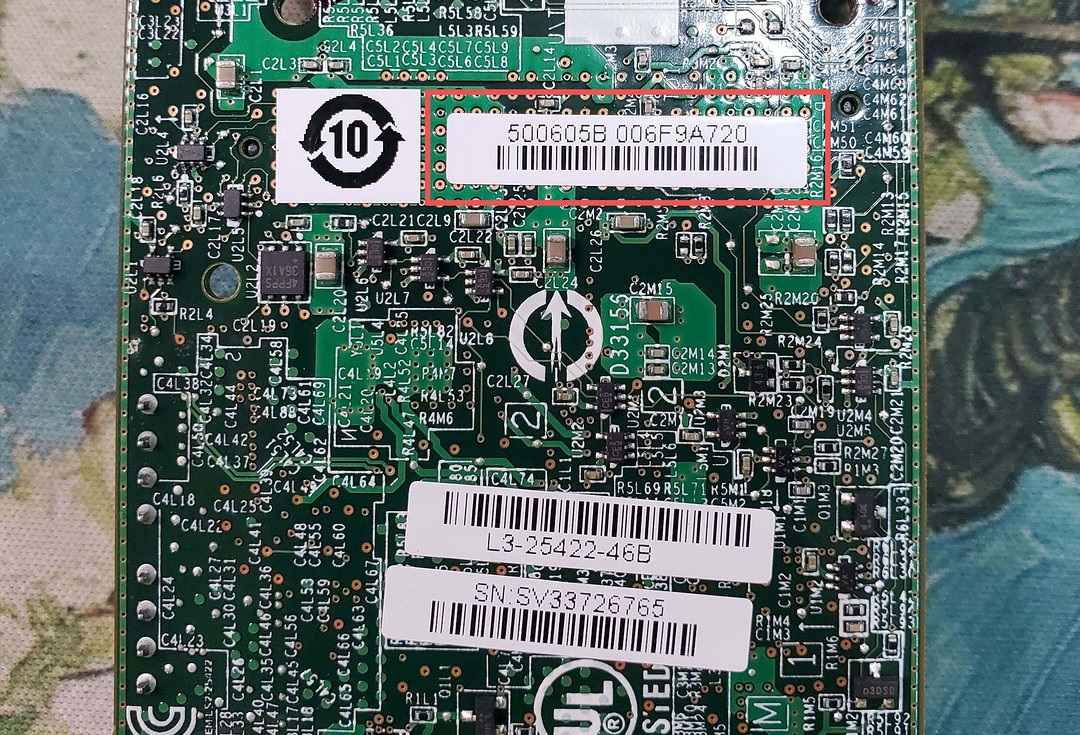
Record the SAS address of the array card
Use your mobile phone to take a photo of the label information (500605BXXX) on the back of the array card. This is the SAS address for future reference.
DOS flash disk production
-
Download Rufus (official address https://rufus.ie/zh/) to your Windows computer;
-
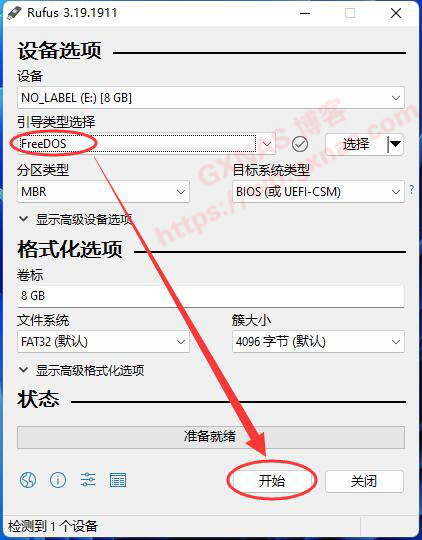
Insert the USB flash drive into the computer and open the Rufus software;
-
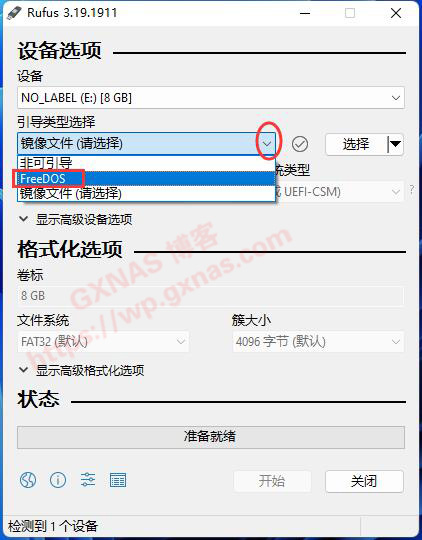
There is a drop-down menu under “Boot Type Selection”. Click it and you will see “FreeDOS”;
-
Confirm that “Device” displays your USB flash drive, select “FreeDOS”, and then click “Start”;
-
Follow the on-screen prompts until complete.
-
Download the files needed for flashing. LSI.zip
-
In the decompressed file, copy all the files in the LSI directory directly into the root directory of the USB disk. At this point, the USB flash drive is ready.
Flashing steps
Prepare
-
First, unplug all PCIE devices. If there is a core graphics output, please also unplug the independent graphics card (if there is no independent graphics, keep the graphics card). Except for the DOS boot USB flash drive, it is best to unplug all hard disks. Then insert the array card into the first PCIE slot (the one closest to the CPU)
-
Turn on the computer and enter the BIOS to confirm that the CSM-compatible boot option is enabled and turn off the fast boot function (fast boot) to ensure that both traditional BIOS and UEFI can boot.
Initializing the IBM 5110 Array Card
Initialization must be completed in non-UEFI mode
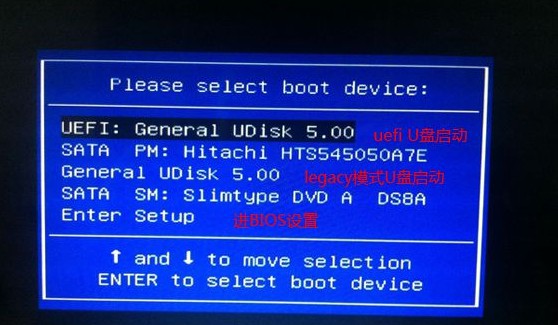
- After booting, select the U disk boot option to enter (note to select legacy mode).
- Check if the adapter number can be read
|
|
or
|
|
Just be able to successfully read “SAS2208”
- clear sbr
|
|
Write a blank 512-byte sbr to the card. After the flashing is successful, you will see the word “success”;
- Clear array card flash memory
|
|
Clear the array card flash memory (NVSRAM). The flash memory on the M5110 card is very large, up to 32MB, so wait patiently for the prompt to complete;
After completion, it is forbidden to press the power on/restart button to restart. Switch to the subsequent steps. Use CTRL + ALT + DELETE to restart to UEFI mode.
Flash firmware, bios, UEFI
-
Reboot (switch) to UEFI mode Use CTRL + ALT + DELETE to reboot into UEFI mode
Pay attention to select UEFI mode -
Switch directory
|
|
Use map command to find all disks
|
|
Enter the disk with the flash file. This is the fs0 disk. It may actually be other disks and is related to the system.
- Flash the Firmware and Bios files
|
|
Note that success will be displayed if successful. If an error occurs, please try
|
|
In fact, I changed a Firmware file. It seems that some versions of M5110 require different Firmware files.
- Flash 2308 UEFI BIOS
|
|
If successful, success will be displayed
-
Check current SAS controller status
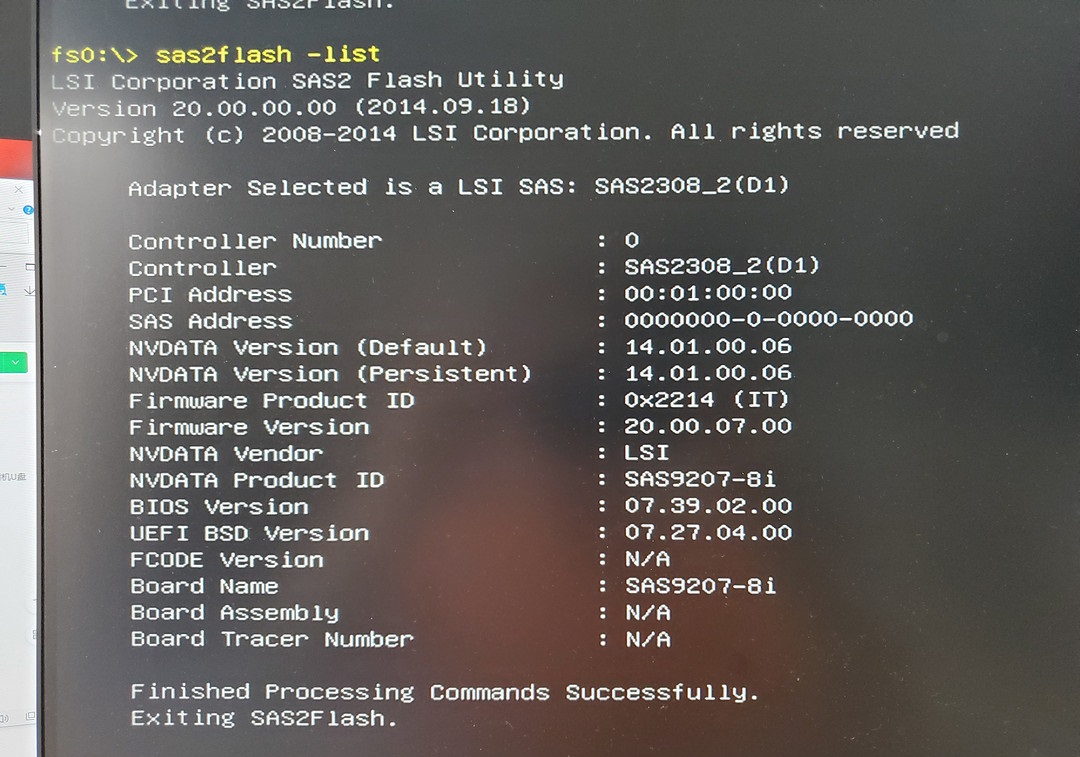
If the result shown below is output, it proves that the firmware and bios are flashed successfully.
The SAS address of the card you just swiped is 0000000-0-0000-0000 -
Reset SAS address
|
|
Set the SAS address to be consistent with the sticker on the card. Note that you do not need to enter the - sign in the address entered above. Just connect the numbers together. After the setting is completed, you can use the following command to view the setting results.
|
|
Related resources
Firmware Avago 9207-8i 20.00.07.00 - P20
User Manual 2.1
Quick Installation Guide
HBA FAQ´s
LSI9240-8I array card is converted to LSI9211-8I pass-through card